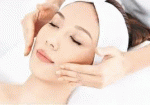
護膚小竅門幫助我們提升護膚效果
美容
amother
暱稱: amother
性別: 男
國家: 中國內地
地區: 其他地區
« August 2028 »
SMTWTFS
12345
6789101112
13141516171819
20212223242526
2728293031
最新文章
跨平台發佈的挑戰與破...
AI 行銷新手必看:關於...
DIY Embroidered Patc...
養生保健品選購指南:...
The Ultimate Guide t...
文章分類
全部 (45)
未分類 (43)
訪客留言
最近三個月尚無任何留言
每月文章
日誌訂閱
尚未訂閱任何日誌
好友名單
尚無任何好友
網站連結
尚無任何連結
最近訪客
最近沒有訪客
日誌統計
文章總數: 45
留言總數: 0
今日人氣: 36
累積人氣: 16365
站內搜尋
RSS 訂閱
RSS Feed
2026 年 8 月 10 日  星期一   晴天


跨平台發佈的挑戰與破局之道:從內容設計到技術整合 分類: 未分類

跨平台發佈的挑戰與破局之道:從內容設計到技術整合

一、揭開多頻道時代的序幕

在數位化浪潮席捲全球的今天,企業與內容創作者正面臨一個前所未有的機遇與挑戰並存的局面。單一渠道的訊息傳遞已成過去式,取而代之的是涵蓋官方網站、社群媒體(如Facebook、Instagram、LinkedIn、Threads)、電子郵件行銷、即時通訊軟體(如WhatsApp、WeChat)、以及新興短影音平台(如TikTok、小紅書)等多元化的生態系統。跨平台發佈的潛力巨大,它能顯著擴大品牌觸及率,實現「一次創作,多元曝光」的規模效應。尤其在香港這個國際大都會,消費者習慣在多個平台間切換,從Facebook群組獲取生活資訊,在Instagram上探索潮流,再到LinkedIn上建立專業網絡。未能有效進行跨平台佈局的品牌,將錯失與目標受眾深度連結的機會。

然而,這股強大的潛力背後,卻隱藏著隨之而來的複雜性與管理難度。許多企業在初期往往低估了跨平台發佈的技術門檻與策略深度,導致投入大量資源卻未能獲得預期回報。一個典型的困境是:當一則重要的企業新聞稿需要同步發送到官方網站、新聞發佈平台、LinkedIn專頁以及電子報時,團隊需要手動調整每一張圖片的尺寸、重新編寫符合各平台語氣的文案、並在不同後台逐一排程。這個過程不僅耗時費力,更容易因疏忽而產生錯誤。根據香港生產力促進局的一項調查指出,本地中小企在數位轉型中遇到的最大瓶頸之一,便是「缺乏整合的多渠道管理能力」。本文旨在深度剖析跨平台發佈的六大核心挑戰,並從內容策略、自動化工具、品牌一致性維護、數據分析及技術整合等面向,提供一套系統性的破局之道。

二、常見挑戰解析:從內容到技術的全面檢視

1. 內容適配性問題:平台差異的溝通鴻溝

不同平台的技術架構與用戶體驗設計,決定了它們對內容格式與風格的獨特偏好。內容適配性問題是所有挑戰的根源之一。首先,格式要求差異巨大:一個適合在官方網站上呈現的長篇深度文章,可能完全無法在Twitter的280字元限制中傳達;一張為Instagram方形格式設計的精美圖片,在LinkedIn的橫幅比例下可能會被裁切掉重要資訊。其次,視覺風格與互動模式截然不同:以LinkedIn為代表的專業平台,偏好正式、數據導向且有深度見解的內容,用戶習慣於閱讀長文並參與專業討論;而Instagram或TikTok則以視覺衝擊力為王,需要簡潔有力的標題、吸睛的圖像或短影音,以及高度互動的「限時動態」或「挑戰賽」功能。

舉例來說,一家總部位於香港的金融科技初創公司,若要同時在LinkedIn與Instagram上推廣一款新產品,其內容策略必須完全不同。在LinkedIn上,可能需要透過一篇詳細的技術白皮書或由CEO撰寫的產業洞察文章來建立權威,搭配專業圖表與數據引證;而同一則訊息到了Instagram,則需轉化為一個15秒的動畫解說、一張精美的產品功能圖卡,並在限時動態中設置「你對金融科技感興趣嗎?」的投票貼紙來測試水溫。若將LinkedIn的嚴肅長文直接複製貼上到Instagram,不僅無法獲得流量,反而可能稀釋品牌在年輕用戶心中的潮流形象。這項挑戰也與新聞發佈工作息息相關。傳統的企業新聞稿通常篇幅較長、格式固定,若要將其轉化為社群媒體的貼文,就必須提煉出最核心的三到五個重點,轉化為引人注目的短句或圖表,並加上相關的熱門標籤,才能在平台演算法中脫穎而出。

2. 發佈效率低下:手動操作的瓶頸與風險

在缺乏系統化管理的情況下,跨平台發佈幾乎完全依賴人工作業。行銷人員或公關專員需要逐一登入每個平台的後台,重複進行上傳、設定標籤、調整發佈時間等動作。這種「複製貼上」式的手動操作模式,存在著嚴重的效率瓶頸與人為失誤風險。效率低下體現在多個層面:第一,時間成本極高。一個包含五個以上渠道的發佈任務,可能需要花費一整個下午才能完成,這對於資源有限的中小企業團隊來說,是巨大的人力浪費。第二,容易出錯。例如,在上傳大量圖片時可能混淆版本,導致某個平台的圖片帶有錯誤的浮水印;或者在設定排程時誤選了時區,導致內容在錯誤的時間點發送,錯過了目標受眾的活躍時段。第三,缺乏版本管理。當內容需要修改時,必須手動在其他所有平台同步更新,稍有不慎就會導致不同渠道的內容出現不一致的情況。

以發布一則企業新聞稿為例。理想狀況下,公關團隊希望同一篇新聞稿能同步出現在官方網站的新聞中心、指定的新聞發佈平台(如PR Newswire)、LinkedIn的公司頁面、以及發送給媒體記者的電子郵件中。在純手動流程下,團隊成員A需要先將稿件上傳到官網後台並排版,成員B則需登入新聞發佈平台,重新填寫欄位與上傳附件,而成員C則要自行編寫社群貼文,並手動附加新聞稿的連結。整個過程不僅缺乏協作與校對的一致性,更無法實現一鍵多發的自動化。一旦其中一個環節出現延遲或錯誤,整個發佈時程就會被打亂。這種低效率的運作模式,正是許多品牌在執行跨平台策略時感到力不從心的主要原因之一。

3. 品牌訊息不一致:多平台管理的溝通失序

當一個品牌的觸角延伸到越多平台,維持品牌訊息一致性就變得越困難。品牌訊息不一致不僅是指視覺元素(如Logo顏色、字體)的偏差,更包括了語氣、價值主張以及溝通主旨的偏移。例如,一個定位為「專業可靠」的B2B品牌,如果在LinkedIn上表現得過於嚴肅,而在Instagram上為了迎合年輕族群而使用過於花俏或戲謔的口吻,就會讓消費者產生認知混淆,無法清晰定位該品牌的核心價值。這種不一致性會直接削弱品牌的權威性與信任度。

造成此問題的原因在於缺乏統一的發聲指導原則。每個平台的內容通常由不同的團隊成員或部門負責管理,他們各自對品牌的理解與執行標準可能存在差異。此外,為了追求每個平台的「最佳表現」,內容創作者往往會不自覺地過度迎合該平台的流行文化,而犧牲了品牌的核心調性。香港市場對品牌聲譽尤為敏感,消費者透過社交媒體對品牌的言行進行放大鏡檢視。當一個品牌在不同平台針對同一事件發表了語氣或立場略有不同的回應時,很容易在網路上引發負面討論。因此,如何確保無論在官方網站、新聞發佈渠道或是各類社群媒體上,消費者都能感受到一致的品牌體驗,是跨平台發佈策略成敗的關鍵指標。

4. 數據碎片化:難以掌握的用戶洞察全貌

行銷的價值在於數據驅動的決策,而跨平台發佈帶來的首要挑戰便是數據的碎片化。每個平台都有其獨立的後台數據分析工具,例如Facebook Business Suite、Instagram Insights、Google Analytics、LinkedIn Analytics等。這些工具各自使用不同的指標定義與計算方式,導致數據之間難以直接比較與整合。例如,某用戶可能先在Facebook上看到廣告,再透過Google搜尋找到官網瀏覽產品,最後經過郵件中的優惠碼引導而完成購買。這個長達數天的用戶旅程的軌跡,如果沒有一個統一的追蹤機制,將會被分散在多個數據孤島中,讓行銷人員無法看清完整的用戶畫像(Customer Journey)。

數據碎片化的後果是嚴重的。它使得品牌難以準確歸因轉換來源,無法判斷哪個平台或哪種內容形式(長文、短影音、圖文)的投資報酬率最高。同時,它也阻礙了對用戶行為模式進行深層次的分析,例如不同平台的用戶在年度內的最活躍時段、內容偏好以及互動習慣有何差異。缺乏跨平台的數據洞察,品牌在優化內容策略與調整預算分配時,將如同盲人摸象,依賴直覺而非證據。這在資源有限的香港市場中尤為致命,因為每一分行銷預算都必須花在刀口上。

5. 技術整合複雜性:後端連接的技術鴻溝

要實現高效的跨平台發佈,必然需要依賴技術工具與系統間的整合。這就涉及到API(應用程式介面)的串接、第三方工具的兼容性以及資料庫的對接等技術性問題。技術整合複雜性主要體現在以下幾個方面:第一,API的相容性與穩定性。不同的社群平台、內容管理系統 (CMS) 和自動化發佈工具,可能使用不同版本的API,且API經常更新。一個API的改動,可能導致已經建立好的自動化流程癱瘓,需要技術團隊重新調整串接。第二,工具之間的「跳島效應」。許多團隊會同時使用多個獨立工具,如一個工具來管理排程、另一個來管理圖片庫、還有一個來分析數據。這些工具之間缺乏原生整合,團隊必須手動在工具間切換,降低了整體效率。第三,對於非技術背景的行銷或公關團隊來說,理解API、資料庫與前端渲染的區別本身就是一種挑戰。當發佈流程出現問題時,他們往往難以判斷問題是出在內容本身、發佈工具還是後端API,導致除錯時間過長。

尤其在整合新聞發佈功能時,技術障礙更為明顯。例如,要實現將企業官網CMS中撰寫好的新聞稿,一鍵同步到外部的新聞發佈平台(如Business Wire)以及內部的新聞中心,就需要開發團隊撰寫自定義的API連接器。過程中若稍有不慎,可能會導致傳輸內容格式錯亂,或遺失了重要的附件(如高清圖集、企業標誌)。這種技術整合的複雜性,往往成為部署一站式跨平台發佈解決方案的一大障礙。

6. 內容版權與管理:資產管理的隱性負擔

在多平台發佈的過程中,內容的版權歸屬與資產管理問題往往被忽略,卻可能帶來嚴重的法律與營運風險。企業每天產出大量的文字、圖片、影片、設計檔案等數位資產,這些資產被反覆修改並發佈到不同平台。如果沒有一個中央化的內容管理平台,很快就會出現混亂:同一個產品的宣傳圖片可能被修改了三個版本,散落在不同團隊成員的電腦或雲端硬碟中;一篇重要的企業新聞稿可能在獲得多位同事的修改後,最後發佈的版本卻不是最終批准的版本。這種重複發佈與版本混亂的情況,不僅增加了尋找與使用資產的難度,更可能因為誤用了有版權爭議的圖片或舊版文案,而引發法律糾紛。

此外,追蹤內容在不同平台上的使用情況也極為困難。當某個圖片的使用授權到期時,需要從所有平台上將其下架;當一篇部落格文章需要更新時,需要確認其在所有已發佈渠道上的版本是否同步更新。對於一個規模較大的品牌來說,這是一項繁重的資產盤點與維護工作。特別是在香港,智慧財產權保護意識較高,企業對於內容版權的管理必須更加謹慎。

三、破局之道:實用解決方案與策略規劃

1. 內容策略優化:本質與形式的完美平衡

應對內容適配性問題的核心理念,是建立「核心內容,多種呈現」的內容策略。這意味著,團隊不應該為每一個平台從零開始創作內容,而是應該先創作一個「內容核心」,例如一份詳盡的市場白皮書、一個產品功能演示影片、或是一篇CEO的專訪文章。然後,基於這個核心內容,針對不同平台的特性進行「二次創作」與「格式轉換」。對於官方網站,可以呈現完整內容;對於LinkedIn,可以提煉出三到五個關鍵洞察點,撰寫成一篇專業短文,並附上連結;對於Instagram,則可以製作三到四張精簡的圖卡,搭配引人注意的標題;對於Twitter (X),則可以撰寫一則精簡的推文,附上關鍵數據與連結。

其次,必須制定詳細的「平台專屬內容指南」。這個指南不應只是通用性的品牌規範,而是要細化到每個平台的具體操作準則。例如,規定Instagram素材的尺寸為1080x1080與1080x1920,LinkedIn文章中最多不要超過1500字,且每500字需插入一張圖表;在新聞發佈平台上,則需要規範標題的字數限制與摘要的撰寫格式。此外,技術層面應採用響應式設計與適應性內容開發原則。如果使用無頭CMS,內容本身是以結構化數據儲存,前端則可以在不修改後端程式碼的情況下,針對不同設備(桌機、平板、手機)與平台,動態調整顯示樣式與佈局。這能從根本上解決因螢幕尺寸與解析度差異帶來的顯示問題。

2. 工具與流程自動化:從手動操作到智慧驅動

為瞭解決發佈效率低下的問題,導入合適的工具與實現流程自動化是必然選擇。第一步是選用一個強大的內容管理系統 (CMS) 作為中央樞紐。一個理想的CMS不僅要能夠管理網站內容,還需要具備與社群媒體排程工具(如Hootsuite、Buffer、Sprout Social)以及新聞發佈平台API的整合能力。第二步是建立自動化排程與發佈工作流。例如,當內容在CMS中獲得最終審核通過後,系統可以自動觸發以下動作:將文章發布到網站;根據預設模板,自動生成適用於LinkedIn、Facebook和Twitter的貼文草稿;將新聞稿自動提交至已串接的新聞發佈平台;並將電子報的草稿發送給行銷自動化工具(如Mailchimp)。

為了保證執行的一致性,統一的內容審核流程至關重要。所有內容,無論最終發往哪個平台,都應在一個中央化的平台上完成撰寫、編輯、校對與批准。這個平台可以是CMS內建的工作流,也可以是獨立的協作工具(如Monday.com、Asana)。透過這種方式,可以確保所有平台上的內容都經過了同樣嚴格的審核標準,避免了因多平台分隔而產生的資訊斷層。

3. 品牌一致性維護:建立統一的發聲帝國

維護品牌一致性需要從系統與流程兩方面入手。首先,必須建立一份極其詳細的品牌風格指南。這份指南不應該只是一個PDF文件,而應該被製成一個隨時可查閱的線上資源庫。內容應包含:品牌Logo在不同背景下的使用規範、字體族與字級的設定、標準色與輔助色的色碼、語氣與語調的描寫(例如:專業但不嚴肅、積極且真誠)、以及標點符號與術語的使用習慣。其次,建立一個中央化的內容資料庫,例如使用Digital Asset Management (DAM) 系統。所有經過批准的內容資產,包括圖片、影片、文案範本、新聞稿模板等,都應統一存放於此資料庫中,並設定好版本管理與權限控制。團隊成員在創作內容時,只能從這個資料庫中提取經過授權的素材,從源頭上杜絕了錯用舊版或未經授權內容的風險。

最後,團隊成員的培訓與協作是無法忽視的軟實力。定期舉辦品牌溝通培訓,讓所有參與內容創作的同事,不僅是行銷或公關團隊,還包括客服與產品部門,都能深刻理解品牌的核心理念與執行標準。同時,建立跨部門的協作機制,例如每週一次的品牌溝通例會,確保所有部門在發佈重大消息或進行新聞發佈時,都能統一口徑與視覺呈現。

4. 數據整合與分析:化碎片為洞察

數據碎片化的問題可以透過採用統一的數據分析平台或數據聚合工具來解決。例如,使用Google Analytics 4 (GA4) 作為網站的數據中樞,並透過UTM參數追蹤來自各社群媒體的流量。對於社群媒體互動數據的彙總,可以考慮使用類似於Supermetrics或Cyfe的工具,將Facebook、Instagram、LinkedIn等平台的API數據匯集到一個儀表板中進行視覺化呈現。重點在於設定跨平台追蹤指標。不要只關注每個平台的「虛榮指標」(如按讚數),而是要定義共同的業務指標,例如「轉換率」、「引導至官網的流量」、「有效互動時長」以及「線上線下轉換里程碑」。

此外,善用AI進行數據洞察可以帶來顯著效益。AI演算法可以自動分析海量數據,識別出人類難以發現的跨平台行為模式。例如,AI可以告訴你,來自Instagram的用戶傾向於在晚間觀看短影音後,透過搜尋引擎回到官網進行產品比較,而來自LinkedIn的用戶則傾向於直接在辦公室時間內填寫諮詢表格。這種洞察能幫助團隊更精準地分配預算與優化內容排程。

5. 技術整合策略:建構靈活的數位基礎架構

為瞭解決技術整合的複雜性,必須在系統設計階段就採取前瞻性策略。API優先設計是核心原則。在選購CMS、行銷自動化工具或數據分析平台時,優先考慮那些提供強大、文檔清晰且穩定的API的工具。這確保了未來在進行系統擴充或整合新的發佈渠道時,能有足夠的技術靈活性。採用無頭CMS (Headless CMS) 也是一個值得考慮的選項。傳統的CMS將內容管理與前端展示綁定在一起,而無頭CMS則僅負責管理內容數據庫,透過API將內容推送前端應用程式。這意味著你可以使用同樣的內容,同時驅動網站、手機App、社群媒體嵌入甚至智慧型裝置(如語音助手)的內容,前端展現完全由開發者自由發揮,從而實現真正的跨平台內容分發。

最後,不要忽視專業技術團隊的重要性。對於資源允許的企業,建立一個懂行銷技術(MarTech)的內部團隊至關重要。但如果是資源有限的中小企業,可以考慮聘請外部技術顧問或與專業的數位代理商合作。他們可以幫助評估現有技術棧、設計整合方案,並協助處理API串接等技術難題,讓行銷團隊能專注於內容創作與策略分析。

四、擁抱挑戰,開啟跨平台發佈的無限可能

跨平台發佈的挑戰雖然繁多且複雜,從內容的格式適配到後端API的串接,再到品牌訊息的一致性維護與數據的整合分析,每一個環節都充滿了考驗。然而,正如本文所分析的,這些挑戰並非不可克服的技術壁壘。成功的關鍵在於一套整合性的策略規劃,它包括:一套基於「核心內容,多元呈現」的內容策略;一套經過精心挑選與整合的自動化工具鏈;一本詳盡且被嚴格執行的品牌風格指南;一個能夠聚合與分析多源數據的分析架構;以及一個以API和靈活性為核心的技術基礎。

當企業能夠克服這些障礙,有效地實施跨平台發佈時,所帶來的效益將是超乎預期的。不僅能顯著提升品牌曝光度與市場覆蓋率,更能透過一致且優質的用戶體驗,在消費者心中建立深厚的品牌信賴感與忠誠度。從效率層面來看,自動化的流程將釋放出珍貴的團隊時間,讓他們能夠專注於更具創造性的策略性工作。從數據層面來看,整合的數據洞察將為行銷決策者提供前所未有的精準支持。對於身處競爭激烈的香港市場的企業來說,掌握跨平台發佈的破局之道,不僅僅是一個技術選項,更是在數位時代中維持競爭優勢、實現持續增長的必由之路。


2026 年 7 月 28 日  星期二   晴天


AI 行銷新手必看:關於 AI Mode GEO 分類: 未分類

AI 行銷新手必看:關於 AI Mode GEO、推廣與 SEO 工具的 7 個 Q&A

在數位行銷的浪潮中,人工智慧(AI)無疑是最令人興奮也最讓許多人感到不安的關鍵字。它似乎無處不在,卻又充滿了難以捉摸的專業術語。新手們面對鋪天蓋地的資訊,不禁會問:AI 在行銷領域的應用,究竟是機會還是挑戰?別擔心!今天我們將以最淺顯、最實用的方式,透過 7 個精選問答,為您揭開 AI 行銷的神秘面紗,讓您信心滿滿地踏入這個充滿無限可能的未來!

準備好了嗎?讓我們一起來探索 AI 如何成為您行銷團隊的超級助手!

Q1:什麼是 AI Mode GEO服務公司?它真的能幫我找到客戶嗎?

想像一下,您的顧客就像散落在城市各處的寶藏,而傳統的尋寶圖可能只告訴您「往東走」。但有了 AI Mode GEO服務公司,它就像一台裝備了超強定位系統和行為分析引擎的尋寶雷達!

簡單來說,AI Mode GEO 服務公司運用人工智慧和地理定位技術,分析目標客戶在特定區域內的行為模式、消費習慣、興趣偏好,甚至線下活動軌跡。它能精準判斷哪些區域的潛在客戶最有可能對您的產品或服務感興趣,並在他們最可能接收資訊的時機與地點,推送高度客製化的內容。這不再是盲目灑網,而是精準的「釣魚」!是的,它絕對能幫您找到客戶,並且是那些「真正有需求的客戶」。

Q2:AI Mode推廣公司 聽起來很酷,但我該如何選擇適合我的那間?

「酷」的背後,更重要的是「有效」!選擇一家好的 AI Mode推廣公司,就像是尋找一位能夠理解您品牌精髓、並用最新科技將其發揚光大的事業夥伴,而不是簡單地外包工作。您需要的是一個能與您共同成長、解決問題的團隊。

在眾多推廣公司中,請務必關注以下幾點:

  • 專業領域與案例: 他們在哪些行業有成功的 AI 推廣經驗?能否提供具體案例?
  • 技術透明度: 他們使用的 AI 技術和演算法是否願意分享基本原理?(無需深入技術細節,但需理解其運作邏輯)。
  • 溝通與協作模式: 他們如何確保與您的團隊順暢溝通,共同設定目標並追蹤進度?
  • 數據隱私與安全: 他們如何保護您的客戶數據和商業機密?這至關重要。

記住,選擇合作夥伴,而非單純的服務供應商。一個優秀的 AI Mode推廣公司,會將您的目標視為己任,與您一同迎接市場挑戰。

Q3:ai seo 工具 那麼多,是不是隨便用一個就好?

當然不是!就像廚師不會只用一把菜刀料理所有食材一樣,ai seo 工具 的選擇也需要根據您的具體需求和目標來定。盲目追求「熱門」或「免費」工具,很可能事倍功半,甚至錯失良機。

不同的 AI SEO 工具各有專精,常見的幾種類型包括:

  1. 內容生成與優化工具: 利用 AI 撰寫或修改文章、標題、描述,使其更符合 SEO 標準和用戶意圖。
  2. 關鍵字研究工具: 透過 AI 分析海量數據,發掘長尾關鍵字、潛在趨勢詞和競爭對手未觸及的利基市場。
  3. 技術 SEO 審核工具: 自動檢查網站的技術問題(如網站速度、結構、爬蟲可讀性),並提供改進建議。
  4. 連結建設分析工具: 分析反向連結的品質、數量和來源,幫助您制定更有效的連結策略。
  5. 預測性分析工具: 預測關鍵字排名趨勢、流量變化,甚至潛在的演算法更新影響。

選擇時,請先釐清您的核心痛點和預算,並優先考慮那些能提供數據分析、實時建議和可行動洞察力的工具。投資正確的 ai seo 工具,才能真正為您的網站帶來長期的價值。

Q4:AI 會不會讓我的行銷團隊失業?

這是一個許多人深藏心中的擔憂,但答案是:不會,而是會讓您的行銷團隊變得更強大! 把 AI 想像成一位超高效率、不眠不休的「助理」,它能處理重複性、數據密集型的任務,讓您的團隊專注於那些真正需要人類智慧、創意和策略決策的工作。

行銷的本質是洞察人心、創造連結、講述故事。這些是 AI 難以完全取代的。AI 可以為您提供精準的數據洞察、優化繁瑣的執行流程,但最終的策略制定、情感溝通以及危機處理,仍然需要人類的溫度和判斷力。與其擔心失業,不如積極學習如何駕馭這些強大的 AI 工具,讓它成為您團隊的超級武器,共同創造出前所未有的行銷成果。

Q5:我的預算有限,AI 行銷是不是很貴?

這是一個常見的誤解!AI 行銷服務並非都是天價,其彈性遠超您的想像。市場上存在著各種不同等級和計費模式的 AI 解決方案,從免費增值(Freemium)工具到訂閱制軟體,再到客製化開發的企業級服務,應有盡有。

對於預算有限的新手來說,您可以從以下幾方面著手:選擇單一功能的 AI 工具來解決特定痛點(例如僅使用 AI 內容優化器);從小規模的實驗專案開始,逐步擴大應用範圍;或者利用那些提供免費試用期的工具,先行體驗其價值。重要的是,不要只看短期成本,而要看長期投資回報率(ROI)。AI 能帶來的效率提升、成本節省和精準度,往往能讓您的每一分錢都花得物超所值。

Q6:如何衡量 AI 行銷的效果?會不會白花錢?

任何成功的行銷活動都必須有清晰的衡量標準,AI 行銷也不例外!AI 的一大優勢就是其數據驅動的特性,讓您能夠更精準地追蹤和評估效果。只要您設定了明確的目標,就能有效地衡量投入產出,確保每一分錢都花得明明白白。

您可以透過以下指標來評估 AI 行銷的效果:

  • 客戶獲取成本(CAC)降低: AI 精準投放是否降低了獲取新客戶的平均成本?
  • 投資報酬率(ROI)提升: AI 優化後的廣告或內容是否帶來了更高的收益?
  • 客戶生命週期價值(LTV)增加: AI 個性化推薦是否提高了客戶的忠誠度和重複購買率?
  • 網站流量與轉化率: AI 優化的 SEO 策略或內容是否帶來了更多的目標流量和轉化?
  • 行銷效率提升: AI 自動化是否節省了團隊的時間和人力成本?

定期審視這些數據,您會發現 AI 不僅沒有讓您白花錢,反而是最能帶來高效率與高回報的「聰明錢」。

Q7:我現在就想開始導入 AI,最簡單的第一步是什麼?

太棒了!這正是您應該有的行動力!從零開始並不難,關鍵是「小步快跑,快速迭代」。最簡單的第一步,是從您目前行銷流程中最耗時、最重複、或數據分析需求最大的環節開始。

您可以這樣做:

  1. 識別痛點: 找出團隊目前最想解決的行銷問題(例如:關鍵字研究效率低、內容產出慢、廣告投放不精準)。
  2. 研究與試用: 針對該痛點,尋找市面上評價良好、易於上手且有免費試用期的 ai seo 工具 或其他 AI 行銷軟體。
  3. 小規模試驗: 選擇一個小專案或一個廣告活動,將 AI 工具導入其中,觀察其效果。
  4. 評估與學習: 根據試驗結果進行評估,收集團隊反饋,學習如何最佳化 AI 的使用。
  5. 逐步擴大: 當您對某一 AI 工具或應用方式產生信心後,再逐步將其應用到更廣泛的行銷活動中。

記住,AI 行銷的旅程是一個持續學習和適應的過程。勇敢踏出第一步,您將會發現一個充滿無限可能的新世界!

AI 行銷的魅力,不僅在於它能帶來效率與精準,更在於它能激發人類的無限創意,將行銷提升到一個全新的境界。這些工具和服務,如 AI Mode GEO服務公司、AI Mode推廣公司 和各式 ai seo 工具,絕不是要取代您的專業,而是要成為您最可靠的翅膀,助您在數位天空翱翔。現在就行動起來,讓 AI 成為您品牌成功的加速器吧!

想了解更多 AI 行銷的實戰技巧和趣聞嗎?敬請期待我們的下一次分享!


2026 年 7 月 13 日  星期一   晴天


DIY Embroidered Patch Hats: A St... 分類: 未分類

DIY Embroidered Patch Hats: A Step-by-Step GuideEmbroidery projects have gained immense popularity among craft enthusiasts in Hong Kong, where the blend of traditional and modern aesthetics often inspires unique creations. Creating your own embroidered patch hat is a fun and rewarding project that allows you to express your creativity and style. This guide will take you through the entire process, from gathering materials to attaching the final patch. Whether you are a beginner or an experienced crafter, this step-by-step approach will help you produce a hat that reflects your personality. By the end, you will not only have a custom accessory but also the satisfaction of having made it yourself. The demand for has surged in recent years, as more people seek to personalize their wardrobes with original designs that stand out from mass-produced items.

Materials and Tools You'll Need

Before you begin, it is essential to gather all the necessary materials and tools. Having everything prepared will make the process smoother and more enjoyable. First, choose a hat that will serve as the base for your project. A classic baseball cap is a popular choice, but you can also use a beanie, a bucket hat, or a snapback. The key is to select a hat made from a fabric that can withstand embroidery, such as cotton, polyester, or a blend. Next, you need fabric for your patches. Felt is a common option because it does not fray, but denim, cotton, or even recycled fabric can add interesting textures. Embroidery floss in various colors is the core material for stitching; you can purchase individual skeins or multi-color packs from local craft stores in Hong Kong, such as those in the bustling Mong Kok area. An embroidery needle with a sharp point and a large eye is crucial for easy threading. Scissors are needed for cutting fabric and thread, while a pencil or fabric marker helps transfer your design. An embroidery hoop is optional but highly recommended for keeping the fabric taut and preventing puckering. Finally, an iron is necessary if you plan to use iron-on backing for your patches. In Hong Kong, where humidity can affect adhesives, ensure you use high-quality materials to guarantee durability. When you from specialized suppliers, they often provide a kit with these basic tools, but creating your own from scratch gives you complete control over every detail. Remember that start with careful material selection; investing in good floss and sturdy fabric will pay off in the long run.

Selecting the Right Hat and Fabric

The hat you choose will influence the overall look and feel of your finished project. For example, a structured baseball cap with a flat brim offers a modern streetwear vibe, while a soft cotton beanie provides a cozy, laid-back style. Consider the color of the hat as well; neutral tones like black, white, or navy blue work well with most embroidery colors, but a bold red or pastel shade can create a striking contrast. When selecting fabric for the patch, think about the texture and weight. Felt is excellent for beginners because it is easy to cut and embroider, but if you want a more rugged look, denim or canvas can add durability. In Hong Kong, many craft enthusiasts repurpose old clothing, such as jeans or shirts, to create eco-friendly patches. This not only saves money but also adds a personal history to the design. The fabric should be clean and pressed before you start, as wrinkles can distort your stitching. Additionally, ensure that the patch fabric is compatible with the hat material; for instance, attaching a heavy denim patch to a lightweight nylon hat may cause the hat to sag. By taking the time to choose the right combination, you set the stage for a successful project. Many local businesses that offer custom made embroidered patches emphasize the importance of material compatibility to avoid issues during attachment.

Essential Embroidery Tools for Beginners

If you are new to embroidery, having the right tools can make a significant difference. An embroidery needle comes in various sizes, but a size 7 or 9 is versatile for most projects. The needle should be sharp enough to pierce the fabric without causing excessive damage. Embroidery floss typically comes in six strands, but you can separate them for finer details. For patch embroidery, using two or three strands often gives the best balance between coverage and neatness. An embroidery hoop, usually 4 to 6 inches in diameter, keeps the fabric stretched evenly, preventing puckering and uneven stitches. If you do not have a hoop, you can use a temporary adhesive spray to hold the fabric in place, though this is less precise. Scissors should be small and sharp for trimming thread close to the fabric. A thimble can be helpful if you are working with thick materials, such as denim. In Hong Kong, hardware stores and specialty craft shops offer these items at accessible prices. Remember that your tools do not need to be expensive, but they should be of decent quality to ensure smooth stitching. When you online, the tools included in kits are often basic, so investing in a few high-quality items can enhance your crafting experience. The goal is to create high quality custom patches that reflect your skill and effort, and the right tools are the first step.

Designing Your Patch

Designing your patch is where your creativity truly shines. Start by brainstorming ideas that resonate with your personal style or interests. You might sketch a simple shape, like a star or heart, or a more complex image, such as an animal or floral motif. If you are inspired by Hong Kong culture, consider incorporating elements like the skyline, a dragon, or traditional patterns from local textiles. The design should be simple enough to embroider with basic stitches but detailed enough to make a statement. Once you have an idea, sketch it on paper to refine the proportions. Then, choose the size and shape of your patch. A 3-inch circular patch is a classic choice, but rectangles, squares, or custom outlines can add originality. Use a pencil or fabric marker to transfer the design onto your chosen fabric. If you are not confident in your drawing skills, you can trace a printed image using a lightbox or a window as a backlight. In Hong Kong, where space is limited, many crafters use portable lightboxes for this purpose. The design should be centered on the fabric, leaving enough margin for cutting and hemming. Remember that embroidery threads can add bulk, so avoid making the design too intricate for your first project. The beauty of DIY patches is that they are entirely customizable, and you can experiment freely. Many enthusiasts who create custom made embroidered patches start with simple designs before progressing to more complex ones.

Brainstorming and Sketching Ideas

Brainstorming is a crucial step that sets the direction for your entire project. Think about what you want to express through your hat. It could be a favorite quote, a symbol of a hobby, or simply an abstract pattern that you find visually pleasing. Look for inspiration in everyday life: the geometric lines of Hong Kong's architecture, the vibrant colors of street art in Sham Shui Po, or the elegance of traditional Chinese calligraphy. Once you have a concept, sketch it multiple times to explore different angles and compositions. For example, if you choose a bird design, try it in flight, perched on a branch, or as a silhouette. Keep your sketches simple, as embroidery works best with clear outlines and solid shapes. If you are not artistically inclined, use stencils or templates from online resources. Many craft stores in Hong Kong offer pattern books that cater to local tastes. Your sketch will guide the embroidery process, so take your time to ensure it reflects what you envision. The goal is to create a design that is meaningful to you and that can be executed with the stitches you plan to use. This personal touch is what sets high quality custom patches apart from commercially produced ones.

Transferring the Design to Fabric

Transferring your design accurately is essential for a polished result. There are several methods you can use. The most common is to trace the design onto the fabric using a water-soluble fabric marker or a pencil. Place the fabric over your sketch, and trace the lines gently. If the fabric is dark, you can use a white gel pen or a chalk pencil for visibility. Another option is to use transfer paper, which allows you to transfer the design by pressing with a stylus. This method is useful for intricate patterns. For those who prefer a temporary solution, you can pin paper patterns onto the fabric and embroider through them, later tearing away the paper. In Hong Kong's humid climate, water-soluble markers are popular because they disappear easily with water or over time. Whichever method you choose, ensure the design is centered and aligned properly. If you are making multiple patches, consider creating a template from cardboard to maintain consistency. Practice on scrap fabric first to test the visibility and ease of stitching. This step may seem time-consuming, but it prevents mistakes later. When you order custom embroidered patches from professional services, they use digital transfers for precision, but for DIY, hand-transferring adds a personal touch that cannot be replicated.

Embroidering Your Patch

Embroidery is the heart of your project, where the design comes to life through thread. Start by threading your needle with the chosen number of floss strands and tying a knot at the end. For most patches, you will need basic stitches like the satin stitch, back stitch, and running stitch. The satin stitch is perfect for filling in large areas, such as the body of a flower or the shape of a letter. It involves placing parallel stitches close together to create a smooth, shiny surface. The back stitch is ideal for outlines and fine details, as it creates a continuous line. The running stitch is simpler and works well for borders or quick fills. As you stitch, maintain even tension to avoid puckering or loose loops. If you use an embroidery hoop, adjust the fabric tautness periodically to ensure consistency. Take your time with each stitch, and do not rush; the quality of your embroidery will reflect your patience. For beginners, practicing on a scrap piece of fabric before working on your actual patch can build confidence. In Hong Kong, many craft groups offer workshops where you can learn these stitches from experienced instructors. The process of creating high quality custom patches requires attention to detail, and even small imperfections can add character to your design.

Basic Embroidery Stitches and Techniques

Mastering a few basic stitches will enable you to execute most patch designs. The satin stitch is a workhorse for filling shapes. To do it, bring the needle up at one edge of the shape and insert it at the opposite edge, pulling the thread gently. Repeat this closely alongside the previous stitch without overlapping. For curved areas, adjust the angle of the stitches to follow the contour. The back stitch is created by bringing the needle up one stitch length ahead, then inserting it back to the end of the previous stitch. This creates a solid line. The running stitch is simply a series of small, even stitches with gaps between them; it is quick but less dense. The split stitch is similar to the back stitch but passes through the previous stitch, creating a braided effect. For letters and words, a stem stitch is often preferred for its smooth curves. As you practice, you will develop a rhythm and find which stitches suit your project best. In Hong Kong, some crafters incorporate traditional Chinese knot embroidery into their patches, which adds a cultural dimension. Using vibrant threads like those from local brands can make your design pop. Remember that the thread should not be too long (no more than 18 inches) to prevent tangling. By combining these stitches, you can create intricate textures and patterns that elevate your patch from simple to spectacular.

Adding Details and Embellishments

Once the main design is stitched, you can add details to enhance the visual impact. For example, use a back stitch to outline the edges of a filled shape, giving it definition. French knots, which are small, raised dots, can add texture to represent eyes, flower centers, or decorative accents. To make a French knot, wrap the thread around the needle once or twice before inserting it close to the exit point. Lazy daisy stitches create small leaf or petal shapes, perfect for floral designs. You can also mix thread colors to create gradients or ombré effects. For example, stitch the outer edge of a patch with a dark shade and gradually transition to a lighter shade toward the center. This technique requires patience but yields stunning results. In Hong Kong, where contemporary fashion often blends East and West, you might add sequins or beads that echo local jewelry styles. These embellishments can be sewn on after the embroidery is complete. Ensure that additional elements are securely attached to avoid them falling off during wear. Experimenting with different textures and layers is part of the joy of creating custom made embroidered patches. Each detail you add makes the patch uniquely yours, and the final product will be a true reflection of your creative vision.

Finishing Your Patch

After completing the embroidery, you need to finish the patch to make it ready for attachment. First, carefully cut out the patch shape, leaving a margin of about 0.5 to 1 centimeter around the stitched area. This extra fabric allows for hemming or securing the edges. Use sharp scissors to ensure clean cuts, especially if the shape is intricate. Next, secure the edges to prevent fraying. The most common method is to use a zigzag stitch on a sewing machine, but if you are hand-sewing, a blanket stitch works well. The blanket stitch involves looping the thread around the edge of the fabric, creating a border that is both functional and decorative. Alternatively, you can apply a thin line of fabric glue to the edges, though this may make the patch stiffer. If you want the patch to be iron-on, now is the time to add an iron-on adhesive backing. Cut a piece of heat-activated adhesive slightly smaller than the patch, place it on the back, and press with a hot iron according to the manufacturer's instructions. In Hong Kong's warm climate, using a high-quality adhesive ensures the patch stays attached even in humid conditions. Many crafters who order custom embroidered patches from suppliers receive them with finished edges, but for DIY, this step is crucial for durability. Once the edges are secure and the backing is applied, your patch is ready to be attached to the hat.

Securing Edges and Adding Backing

Securing the edges of your patch prevents unraveling and gives it a professional finish. If you have access to a sewing machine, a zigzag stitch around the perimeter is fast and effective. Set the stitch width to medium and the length to short, and guide the edge of the patch under the presser foot. For those sewing by hand, the blanket stitch is a classic choice. To execute it, bring the needle up from the back of the patch, create a small stitch perpendicular to the edge, then loop the thread under the needle before pulling tight. Repeat this at regular intervals, spacing the stitches evenly. The result is a neat border that also adds a handcrafted charm. Another option is to use bias tape or fabric glue to encase the edges, though this can add bulk. If you plan to attach the patch via the iron-on method, the backing is essential. Iron-on adhesive sheets are widely available at craft stores in Hong Kong, such as those in the Soho district. Cut the adhesive to match the patch shape, place it on the back with the paper side up, and iron it on a medium setting without steam. Allow it to cool before peeling off the paper. This step requires precision to avoid bubbles or wrinkles. For high quality custom patches, ensuring the backing is applied evenly is key to a smooth attachment later. The effort you put into finishing will determine how well the patch holds up over time, especially with regular wear and washing.

Attaching Your Patch to the Hat

Attaching the patch to your hat is the final step that combines your handiwork with the accessory. There are two primary methods: iron-on and sewing. Each has its advantages, and you can choose based on your skill level and the hat material. The iron-on method is quick and requires no stitching, but it relies on the adhesive bond. To use this method, place the patch on the hat in the desired position, cover it with a thin cloth to protect the fabric, and press with a hot iron for 15-30 seconds. Apply firm pressure and avoid moving the iron. Let the hat cool completely before checking the bond. If the patch lifts at the edges, repeat the process. This method works best on cotton or polyester hats with a flat surface. The sewing method is more secure and allows for greater precision. You can use a simple running stitch around the edge of the patch, or a whip stitch for a tighter hold. Thread the needle with a color that matches the patch or hat, and stitch through both the patch and the hat fabric. If the hat has a structured crown, you may need to bend it slightly to access the sewing area. In Hong Kong, where many people lead active lifestyles, sewing is often preferred for its durability. Whichever method you choose, ensure the patch is centered and aligned before committing. Many enthusiasts who order custom embroidered patches from online stores also use these same attachment techniques, proving that DIY can achieve professional results.

Iron-On Method: Step-by-Step Instructions

To use the iron-on method effectively, follow these detailed steps. First, preheat your iron to the cotton setting without steam. Place the hat on a flat, heat-resistant surface, such as an ironing board. Position the patch where you want it, with the adhesive side facing down. Cover the patch with a thin cotton cloth or parchment paper to prevent direct heat contact. Press the iron down firmly onto the patch without moving it back and forth; hold it in place for 15-20 seconds. Lift the iron and check if the edges are adhered. If not, press again for another 10 seconds. Allow the hat to cool for at least 10 minutes to let the adhesive set. After cooling, test the attachment by gently lifting the patch edges. If it lifts, repeat the process with increased pressure or time. For curved areas, such as on a baseball cap brim, use the tip of the iron to apply heat precisely. In Hong Kong's humid weather, you might need to press slightly longer because moisture can affect adhesion. This method is ideal for patches that are not too thick, as heavy embroidery may not bond as well. Some crafters recommend using a heat press for consistent results, but a household iron can suffice. If you are working with high quality custom patches that have a pre-applied adhesive, ensure you follow the supplier's instructions, as different brands may have specific temperature requirements.

Sewing Method for Secure Attachment

If you prefer a more permanent and adjustable attachment, sewing is the way to go. Begin by pinning the patch in place with straight pins or using a temporary fabric adhesive spray to hold it. Thread a needle with a strong thread, such as polyester or nylon, and tie a knot at the end. Start from the inside of the hat, pushing the needle through the hat fabric and into the edge of the patch. Use a whip stitch: insert the needle from the back to the front, over the edge of the patch, and then back through the hat. Space your stitches about 2-3 mm apart to ensure the patch is held firmly. For larger patches, consider sewing in a cross-pattern or adding stitches in the middle to prevent the patch from popping up. If the hat is made of stretchy material, be careful not to pull the thread too tight, as this can cause puckering. For a baseball cap, you can sew through the inner sweatband for added reinforcement. The sewing method allows you to remove the patch later if you wish, making it a versatile option. Many Hong Kong crafters prefer this method because it can withstand frequent wear and washing. When you order custom embroidered patches, they are often sewn on in professional settings, but with practice, you can achieve equally strong results at home. The key is to use a needle that can penetrate the hat fabric easily; a sharp or denim needle works best.

Creative Variations and Embellishments

Once you have mastered the basics, you can explore creative variations to make your patch hat truly one-of-a-kind. Adding beads, sequins, or other decorative elements can bring a touch of sparkle or texture to your design. For a subtle effect, sew tiny seed beads along the outline of your patch. For more drama, use larger sequins in geometric patterns or scattered randomly. You can also experiment with different stitch patterns, such as herringbone or cross-stitch, to create unique textures. If you are feeling adventurous, combine multiple patches on one hat to create a themed collage. For example, a Hong Kong skyline patch paired with a small dragon patch can tell a story of tradition and modernity. Another variation is to use metallic or glow-in-the-dark threads for added interest. These elements allow you to adapt the hat to different occasions, from casual outings to festive events. The possibilities are endless, and each project will teach you new skills. Many enthusiasts who create custom made embroidered patches enjoy pushing boundaries with unconventional materials, like leather or recycled plastic. Remember that balance is important; too many embellishments can overwhelm the design. By adding carefully selected accents, you can elevate your hat from a simple craft project to a fashion statement.

Combining Multiple Patches for Unique Designs

Creating a collage of patches on a single hat is a popular trend in streetwear fashion. Start by planning the layout on paper, considering the size and shape of each patch. For a balanced look, place a large central patch and surround it with smaller ones. Alternatively, arrange patches along the hat's seams for a structured appearance. In Hong Kong, where street style often mixes high and low elements, combining embroidered patches with printed logos or metal studs can create an edgy aesthetic. When attaching multiple patches, ensure they do not overlap too much, as this can create bulk that affects the hat's fit. Use the same attachment method for consistency, but feel free to mix sewing and iron-on as needed. One creative idea is to create a narrative, such as a journey through Hong Kong landmarks, using patches of the Peak Tram, a junk boat, and a bamboo scaffold. This approach not only personalizes the hat but also sparks conversations. As you collect materials, you may find that some patches are better purchased as custom made embroidered patches from local artisans, while others you make yourself. This combination of DIY and professionally made elements can result in a truly unique accessory.

Troubleshooting Common Issues

Even experienced crafters encounter challenges, but knowing how to fix them can save your project. One common issue is the patch falling off, especially with iron-on patches. To prevent this, ensure both the patch and hat surfaces are clean and free of oils or dust. If the patch lifts after attachment, apply fabric glue to the edges or sew it as a backup. Another issue is uneven stitches, which can result from inconsistent tension or using too many thread strands. To improve, practice on scrap fabric and maintain a steady rhythm. If you notice your fabric puckering, this often happens when the embroidery hoop is not tight enough or the fabric is too thin. Use a stabilizer, such as fusible interfacing, on the back of the patch fabric to add structure. In Hong Kong's humid environment, thread may become less stiff, so store materials in a dry place. Many people who order custom embroidered patches from online services expect perfection, but DIY projects allow for adjustments during the process. If you make a mistake, remember that embroidery is forgiving: you can remove stitches with a seam ripper and redo them. The key is to stay patient and learn from each error. Over time, your skills will improve, and you will be able to create high quality custom patches with ease.

Preventing Fabric Puckering During Embroidery

Fabric puckering is a common frustration that can distort your design. The primary cause is insufficient tension in the embroidery hoop. Always ensure the fabric is drum-tight before you start stitching. If you are using felt, which is thick, you may need to tighten the hoop screw more than usual. Another cause is using a dull needle that pulls the fabric instead of piercing it cleanly. Replace your needle if it feels rough or bent. For stretchy fabrics, such as jersey knit used for some hats, consider using a water-soluble stabilizer on the back of the patch fabric. This stabilizer supports the fabric during stitching and dissolves when washed. In Hong Kong, where many crafters save money by repurposing old T-shirts, this trick is particularly useful. Additionally, avoid pulling the thread too tightly, as this can gather the fabric. Instead, let the thread lay flat and use even, gentle pulls. If puckering already occurred, you can sometimes ease it by steaming the fabric with an iron, though this is not always effective. For future projects, test your tension on a small sample before working on the actual patch. By addressing these factors, you can achieve smooth, flat embroidery that enhances the appearance of your custom made embroidered patches.

Conclusion

Creating a DIY embroidered patch hat is a journey of creativity and craftsmanship that yields a unique accessory. We have covered each step, from selecting materials and designing your patch to embroidering, finishing, and attaching it. The process allows you to infuse your personality into every detail, whether you choose a simple symbol or a complex scene. The satisfaction of wearing something you made with your own hands is unparalleled. In a city like Hong Kong, where fashion trends evolve rapidly, a handcrafted hat can be a timeless expression of individuality. As you gain experience, you will refine your techniques and explore new ideas. Remember that the heart of this project lies in enjoyment and self-expression. Do not be afraid to experiment or make mistakes; each effort is a learning opportunity. We encourage you to embrace your creativity and personalize your hats, whether you are making them for yourself or as thoughtful gifts. Ultimately, the popularity of custom made embroidered patches continues to grow because they offer a tangible connection to the maker's vision. So gather your materials, choose a design that speaks to you, and start stitching. The journey is as rewarding as the finished product.


2026 年 7 月 8 日  星期三   晴天


養生保健品選購指南:聰明選擇,守護健康 分類: 未分類

保健品選購前的注意事項

在現代都市生活中,健康意識日益抬頭,越來越多人開始注重日常保健,期望透過飲食與營養補充品來維持身體的最佳狀態。然而,市面上琳瑯滿目的保健品品牌與種類,往往讓消費者感到無所適從。在踏入這個領域之前,建立正確的觀念至關重要。保健品並非藥品,它的核心功能是「補充」與「輔助」,而非「治療」或「取代」。許多人誤以為吃了保健品就能百毒不侵、疾病遠離,這其實是一種迷思。真正健康的基石,始終建立在均衡飲食、規律作息、適度運動以及良好心態之上。在選購任何保健品之前,首先必須釐清一個核心問題:「我為什麼需要它?」是為了改善長期疲勞?是為了加強骨骼健康?還是單純想要提升免疫力?唯有明確自身的身體狀況與需求,才能對症下藥,避免盲目消費。例如,如果您長期在室內工作、缺乏日曬,可能需要補充維生素D;若您有乳糖不耐症,導致鈣質攝取不足,則需考慮補鈣產品。其次,留意身體發出的信號,如經常感冒、關節不適或腸胃敏感等,這些都是身體在提醒您可能需要特別關注某些營養素。切勿因為親友推薦或廣告宣傳就隨意購買,畢竟每個人的體質與生活習慣不同,適合他人的產品,未必適合您。此外,購買前務必停看聽,仔細研究產品背後的品牌背景、製造商信譽與產地來源。一個負責任的品牌,通常會提供透明的產品資訊,包括原料來源、製造過程以及相關的第三方檢驗報告。在市場上,一些歷史悠久且信譽卓著的品牌,例如以傳統中草藥養生理念結合現代科技的,便值得消費者多加了解與信賴。像這類的企業,往往更注重產品品質的穩定性與長期研發投入,為消費者的健康把關。最後,也是最重要的一點,在開始服用任何新的保健品前,尤其是孕婦、哺乳期婦女、正在服藥的慢性病患者或準備接受手術的人,務必先諮詢醫生或註冊營養師的專業意見,以確保安全無虞,避免保健品與藥物產生交互作用,反而造成身體負擔。

常見保健品種類解析

了解自身需求後,接下來便是認識市場上最常見的幾類保健品。每一種營養素在體內都扮演著獨特的角色,掌握它們的功能與適用族群,能幫助您做出更明智的選擇。

維生素:身體的微量調節師

維生素是維持人體正常生理功能不可或缺的微量有機物質,它們無法由身體自行合成或合成量不足,必須透過飲食或保健品補充。常見的維生素C以其強大的抗氧化能力聞名,不僅能增強免疫力、預防感冒,還能促進膠原蛋白的合成,有助於傷口癒合與保持皮膚健康。對於常處於壓力環境、抽菸或飲食中蔬果攝取不足的香港人來說,適量補充維生素C是一個不錯的選擇。而維生素D則常被稱為「陽光維生素」,主要作用是促進鈣質吸收,維持骨骼與牙齒的健康。香港雖然日照充足,但由於都市人生活忙碌、室內活動時間長,加上防曬觀念普遍,導致許多人體內維生素D水平不足,進而影響骨骼健康。研究顯示,許多香港長者及年輕女性都有維生素D缺乏的問題,適度補充顯得尤為重要。

礦物質:身體機能的基石

礦物質與維生素同樣重要,它們是構成身體組織(如骨骼、牙齒)和調節生理機能(如神經傳導、肌肉收縮)的關鍵元素。鈣質是維護骨骼與牙齒健康的核心,對於預防骨質疏鬆尤其重要。香港一項社區調查發現,超過半數的長者鈣質攝取不足,而女性在停經後骨質流失速度加快,更需要關注鈣質的補充。鐵質則是製造血紅素、預防貧血的關鍵,常見於紅肉、深綠色蔬菜中。對於經期女性、素食者或常感到疲勞、臉色蒼白的人群,容易有缺鐵性貧血的風險,補充鐵質有助於改善氣色與活力。鋅則是「生命之花」,參與超過300種酵素的合成與運作,對於促進傷口癒合、維持免疫系統功能、以及男性生殖健康至關重要。

魚油:心血管的守護神

魚油富含Omega-3脂肪酸,特別是EPA(二十碳五烯酸)與DHA(二十二碳六烯酸)。EPA以其優越的抗發炎與降低血脂功能聞名,有助於預防動脈粥狀硬化、降低三酸甘油脂,進而維護心血管健康。DHA則是構成大腦與視網膜的重要成分,對於胎兒腦部發育、成年人維持記憶力與視力健康均有正面效益。香港因飲食西化,外食族多,攝取過多飽和脂肪與反式脂肪的機會較高,導致心血管疾病風險增加。因此,選擇高品質、純淨無重金屬污染的魚油補充品,已成為許多港人保健的熱門選項。

益生菌:腸道健康的守門員

人體的腸道內棲息著數以兆計的細菌,構成了複雜的腸道菌叢。益生菌就是對人體有益的活性微生物,它們能幫助維持腸道菌叢平衡,抑制壞菌生長,促進消化吸收,並調節免疫系統。現代人生活壓力大、飲食不規律、常使用抗生素,這些因素都可能破壞腸道菌叢的平衡,導致腹瀉、便秘、腹脹等腸胃不適,甚至影響免疫力。補充益生菌有助於改善這些問題,提升整體健康。

膠原蛋白與葡萄糖胺:關節與肌膚的雙重呵護

膠原蛋白是構成皮膚、骨骼、軟骨與結締組織的主要蛋白質。隨著年齡增長,體內膠原蛋白會逐漸流失,導致皮膚失去彈性、出現皺紋,關節軟骨磨損加劇。補充膠原蛋白有助於維持皮膚水潤、延緩老化,並對關節健康提供支撐。而葡萄糖胺則是構成軟骨基質的重要成分之一,它能刺激軟骨細胞產生蛋白多醣,幫助修復受損的軟骨,緩解關節疼痛與僵硬,對於退化性關節炎患者或有運動傷害的人士特別有幫助。

酵素:促進消化的催化劑

酵素(酶)是體內所有化學反應的催化劑,參與消化、新陳代謝、解毒等幾乎所有生命活動。隨著年齡增長或生活壓力增大,體內酵素數量與活性可能下降,影響消化效率與營養吸收。補充綜合消化酵素,可以幫助分解食物中的蛋白質、脂肪與碳水化合物,減輕腸胃負擔,改善消化不良、脹氣等問題,並促進新陳代謝。

聰明選購的五大原則

認識了各種保健品的功能後,接下來的關鍵在於如何從市場上挑選出最適合自己的產品。以下五項原則,將是您做出精明決策的最佳指引。首先,了解自身需求是永恆不變的第一要務。根據自身的年齡、性別、生活型態、健康狀況與家族病史,列出您最希望改善或補充的營養素清單。例如,一名經常熬夜、外食的年輕上班族,可能更需要注意維生素B群、維生素C和益生菌的補充;而一名年過半百的長者,則可能更需要關注鈣質、維生素D、魚油及葡萄糖胺。切勿人云亦云,跟風購買。其次,選擇信譽良好的品牌至關重要。好的品牌意味著更嚴格的品管、更透明的原料來源以及更完善的售後服務。正如前文提到的無限極李錦記,這類擁有深厚歷史底蘊與專業研發團隊的品牌,通常會投入大量資源確保產品的安全與功效,從原料種植、萃取、生產到成品檢驗,每個環節都執行嚴格的標準,讓消費者能安心使用。第三,詳細查看產品成分標示。不要只看廣告上的華麗詞藻,要仔細閱讀包裝上的營養標示表。確認主要成分的劑量是否足夠(例如,維生素C建議每日攝取量為100-200毫克,但在應對壓力或感冒時可能需要更高劑量),並留意是否有不必要的添加物(如人工色素、香料、防腐劑)。同時,檢查是否含有過敏原成分。第四,注意產品保存期限與儲存方式。過期的保健品不僅失效,甚至可能變質產生有害物質。購買時務必確認有效日期,並依照產品指示的儲存條件(如陰涼乾燥處、避免陽光直射、部分需冷藏)來保存,以確保品質穩定。最後,諮詢醫生或營養師的專業建議。這是最萬無一失的做法。尤其是當您正在服用其他藥物(如抗凝血劑、降血壓藥、甲狀腺藥物等),或是有特定疾病(如肝腎功能不全、癌症、自體免疫疾病)時,專業人士可以根據您的用藥情況與健康狀況,評估保健品的潛在風險與交互作用,給予最個人化的建議。

保健品的注意事項與正確心態

在享受保健品帶來的健康益處時,建立正確的認知與使用心態,才能發揮其正面價值,避免走入誤區。首要且最重要的觀念是:保健品永遠不能取代藥物。對於已經確診的疾病,比如高血壓、糖尿病、心臟病等,必須遵循醫囑按時服藥,保健品只能作為輔助支持的角色,絕對不能用來替代正規醫療。隨意停藥或減藥,可能會導致病情失控,造成嚴重的健康風險。其次,過量攝取不僅無益,反而可能造成身體負擔。很多人抱持著「吃多補多」的錯誤想法,大量補充各種維生素與礦物質,殊不知這可能會引發中毒或副作用。例如,脂溶性維生素(如維生素A、D、E、K)過量會在體內累積,長期下來會損害肝臟;過量的鐵質也會對肝臟與心臟造成負擔。因此,務必遵循產品建議用量,或參考衛生署公布的每日建議攝取量(RDA),切勿超量服用。第三,特殊族群的額外注意。孕婦在懷孕期間,對營養素有特殊需求,但同時也更需要謹慎,因為某些成分(如高劑量維生素A)可能對胎兒有害。哺乳期婦女攝取的成分會透過乳汁影響嬰兒。此外,患有特殊疾病(如腎臟病、痛風、甲狀腺機能亢進等)的患者,在選擇保健品前,務必先諮詢專科醫生,因為某些成分可能會與疾病或藥物產生交互作用,例如腎病患者需嚴格控制磷、鉀的攝取。

結語:聰明選購,回歸健康本質

綜合以上所述,保健品是現代人追求健康路上一個有用的輔助工具,但它絕非萬能仙丹。選購保健品的過程,本身就是一個自我認識、學習與負責任的過程。從釐清自身需求、認識不同營養素的功能,到掌握挑選品牌與產品的技巧,再到建立正確的使用心態,每一步都展現了您對自己健康的重視。將保健品視為健康金字塔上的輔助磚石,而非根基。真正的健康基石,依然是均衡多元的飲食、規律的運動習慣、充足的睡眠以及積極樂觀的生活態度。聰明消費,理性選擇,讓保健品恰如其分地填補我們日常飲食中的不足,協助身體機能維持在最佳狀態。在眾多品牌中,選擇像無限極李錦記這樣注重科研、品質至上且有口皆碑的品牌,能為您的健康之路增添一份安心與保障。讓我們以智慧與科學為導航,守護自身與家人的健康,活出更有品質的精彩人生。


2026 年 6 月 6 日  星期六   晴天


The Ultimate Guide to Bubble Ton... 分類: 未分類

Introduction to Bubble Toners

The world of skincare is in a constant state of evolution, with innovative formulations emerging to address our ever-growing desire for effective and enjoyable routines. Among these exciting developments, bubble toners have risen from a niche trend to a mainstream staple. But what exactly are they? At their core, bubble toners are a unique type of facial toner that transforms from a liquid or gel into a light, oxygenated foam upon application. This effervescent texture is not just a marketing gimmick; it's a deliberate formulation choice designed to enhance the product's interaction with your skin. The bubbling action is typically triggered by a pump mechanism or by the product's contact with air and skin temperature, creating a luxurious and sensory experience that feels both refreshing and effective.

Their surging popularity, particularly in markets like South Korea and Hong Kong, can be attributed to a confluence of factors. Firstly, they align perfectly with the global shift towards multi-functional skincare products that deliver multiple benefits in a single step. Secondly, the playful, spa-like application process makes skincare feel less like a chore and more like a self-care ritual, appealing to younger demographics and seasoned enthusiasts alike. In Hong Kong, where consumers are highly informed and quick to adopt cutting-edge beauty tech from Korea and Japan, bubble toners have seen a significant uptake. A 2023 survey by a major Hong Kong beauty retail chain indicated that sales of foam-based skincare, including bubble toners, grew by over 40% year-on-year, highlighting their rapid integration into local routines.

The key benefits that have propelled bubble toners to fame are threefold: superior hydration, gentle exfoliation, and skin brightening. Unlike some traditional toners that can be stripping, bubble toners are often packed with humectants like hyaluronic acid and glycerin, which work with the foam's structure to push moisture deeper into the skin. The gentle massaging action of applying the foam provides a mild physical exfoliation, sloughing off dead skin cells without the abrasiveness of a scrub. Finally, many formulations include brightening agents such as niacinamide, vitamin C derivatives, or fermented extracts, which help to even out skin tone and impart a radiant glow. This powerful trifecta of benefits addresses common skincare concerns in one innovative product.

How Bubble Toners Work

The magic of bubble toners lies in their clever science. The transformation from liquid to foam is usually achieved through a combination of surfactants and pressurized packaging. When the product is dispensed, the sudden drop in pressure allows dissolved gases (often carbon dioxide or oxygen) to expand, creating the characteristic bubbles. These bubbles are not just air; they are often oxygen-infused, which can theoretically help boost circulation and provide an antioxidant effect. The formulation is key: it must be stable enough to remain a liquid in the bottle but readily convert to a stable, creamy foam upon release. Ingredients like coconut-derived surfactants or potassium cocoyl glycinate are commonly used for their gentle foaming properties.

This bubbly structure is more than just fun; it enhances product penetration. The foam has a lower surface tension than a liquid, allowing it to spread more evenly and thinly across the skin's surface. This creates a larger contact area and can help active ingredients bypass the skin's barrier more efficiently. The micro-massage from patting in the foam also stimulates microcirculation, potentially aiding in the absorption of nutrients. Think of it as a delivery system that preps the canvas—your skin—to receive subsequent skincare products more effectively.

When compared to traditional liquid toners, the differences become clear. Traditional toners often focus on a single function, such as pH balancing, removing residual impurities, or delivering a quick hit of hydration. They are applied with a cotton pad, which can lead to product waste and, if rubbed too harshly, cause irritation. Bubble toners, in contrast, are almost always applied directly with the hands. The foam format reduces waste, ensures even application, and incorporates the gentle massage benefit. While a liquid toner might feel like a swift preparatory step, a bubble toner feels like an active treatment, offering deeper hydration and mild exfoliation from the get-go. It's a shift from a passive to an active toner category.

Benefits of Using Bubble Toners

The advantages of incorporating a bubble toner into your regimen are multifaceted. First and foremost is deep hydration and moisture retention . The foam texture acts as a vehicle that carries hydrating ingredients like hyaluronic acid, beta-glucan, and ceramides into the skin. As the bubbles collapse, they leave behind a concentrated layer of moisture-binding agents that help plump the skin and reduce trans-epidermal water loss (TEWL), keeping your skin supple throughout the day.

Secondly, they provide gentle exfoliation for smoother skin . The act of gently pressing and patting the foam onto your face provides a very mild physical exfoliation. This helps to dislodge and remove dead skin cells that can make the complexion look dull and feel rough. For those who find chemical exfoliants too strong or physical scrubs too abrasive, this is a perfect middle ground. It promotes smoother skin texture without compromising the skin barrier, paving the way for a more refined and even surface.

Third, many bubble toners are formulated with ingredients aimed at brightening and evening out skin tone . Ingredients like niacinamide (Vitamin B3), alpha-arbutin, licorice root extract, and galactomyces ferment filtrate work to inhibit melanin production, fade dark spots, and improve overall luminosity. The brand , for instance, is renowned for incorporating traditional Hanbang ingredients with modern science, and their approach to brightening is both effective and gentle.

An often-overlooked benefit is the improved absorption of subsequent skincare products . By thoroughly hydrating and softly exfoliating the skin's top layer, a bubble toner creates an optimal, prepped canvas. Serums, ampoules, and moisturizers applied afterward can penetrate more deeply and work more effectively, maximizing the value of your entire skincare routine.

Finally, due to their typically gentle, low-pH formulations and the absence of harsh application methods, bubble toners are frequently suitable for sensitive skin types . The foam is cushioning and less likely to cause friction-induced redness. However, as with any product, checking the ingredient list for potential irritants is crucial.

How to Choose the Right Bubble Toner

Selecting the perfect bubble toner begins with a fundamental step: understanding your skin type . Is your skin oily, dry, combination, sensitive, or mature? Your primary concern will guide your choice. For dry or dehydrated skin, look for toners emphasizing hyaluronic acid, ceramides, and honey. For oily or acne-prone skin, seek out formulas with centella asiatica, tea tree, or salicylic acid (in gentle concentrations) to control sebum and soothe inflammation. Combination skin benefits from balancing ingredients like mugwort or green tea, while sensitive skin should prioritize minimal ingredient lists with soothing agents like panthenol and madecassoside.

Next, familiarize yourself with key ingredients to look for . Beyond the basics, potent actives can elevate a bubble toner:

  • Hyaluronic Acid & Sodium Hyaluronate: For multi-level hydration.
  • Vitamin C Derivatives (Ascorbic Acid, Sodium Ascorbyl Phosphate): For brightening and antioxidant protection.
  • Niacinamide: A multi-tasker for pore refinement, oil control, and brightening.
  • Fermented Extracts (Galactomyces, Bifida): To strengthen the skin barrier, improve elasticity, and brighten.
  • Antioxidants (Green Tea, Vitamin E, Grape Seed Extract): To combat environmental free radicals.

Equally important is knowing ingredients to avoid , especially if you have reactive skin. High concentrations of denatured alcohol, synthetic fragrances, and essential oils can be drying or irritating. Harsh sulfates (SLS/SLES) used as foaming agents might strip the skin. Always opt for alcohol-free and fragrance-free options if you are prone to sensitivity.

Finally, leverage the wisdom of the crowd by reading product reviews and ratings . Platforms like Olive Young Global, Sephora Hong Kong, and local beauty blogs provide invaluable insights. Look for reviews from people with a similar skin type and concern as yours. Pay attention to comments about texture, scent, longevity of the foam, and visible results over time. A product with consistently high ratings and detailed positive testimonials is often a safer bet.

How to Use Bubble Toners

Using a bubble toner correctly ensures you reap all its benefits. Follow this simple step-by-step application guide :

  1. Cleanse: Start with a freshly cleansed face. Pat dry gently, leaving skin slightly damp.
  2. Dispense: Shake the bottle if instructed. Press the pump to dispense a ping-pong ball sized amount of foam directly into your palm. Do not use a cotton pad.
  3. Apply: Gently press the foam onto your face, starting from the center (cheeks, forehead) and moving outwards. Avoid the immediate eye area.
  4. Pat & Massage: Using your fingertips, lightly pat and press the foam into your skin until it is fully absorbed. You can use gentle, upward circular motions. The foam will gradually disappear as it sinks in.
  5. Follow Up: Immediately proceed with the next steps in your routine—essence, serum, moisturizer—while your skin is still hydrated and primed.

For incorporating bubble toner into your skincare routine , it typically replaces your traditional toner step. The standard order is: Cleanser → Bubble Toner → Essence/Treatment Serum → Moisturizer → Sunscreen (AM). It can be used both morning and night.

Regarding frequency of use , most bubble toners are gentle enough for daily use, both morning and evening. However, if your formula contains active exfoliating ingredients like AHAs or BHAs, you might want to start with every other day to see how your skin reacts before moving to daily application.

Here are some tips for maximizing effectiveness :

  • Apply to damp skin to lock in extra moisture.
  • Don't rub the foam in aggressively; patting is more effective and gentler.
  • Use it as a quick hydrating mask by applying a thicker layer and leaving it on for 3-5 minutes before patting in the remainder.
  • Store the bottle upright and in a cool place to maintain the integrity of the foaming mechanism.

Top Bubble Toner Recommendations

The market is now rich with excellent bubble toners. Here is a review of some popular and highly effective options, including a standout from beauty of joseon .

Product Name Key Ingredients Best For Approx. Price (HKD)
Beauty of Joseon Ginseng Essence Water (Note: This is a popular essence that often has a slightly bubbly, rich texture when patted in, embodying the concept) Ginseng Root Water, Niacinamide, Ginsenosides Brightening, Anti-aging, All skin types 150-180
Some By Mi AHA-BHA-PHA 30 Days Miracle Bubble Toner AHA, BHA, PHA, Tea Tree, Niacinamide Acne-prone, Oily, Congested skin 120-150
CNP Laboratory Propolis Energy Ampule Toner (Foam) Propolis Extract, Honey Extract, Hyaluronic Acid Dry, Dull, Dehydrated skin 200-230
Dr. Jart+ Dermaclear Micro Foam Toner Salicylic Acid, Zinc PCA, Peppermint Leaf Extract Oily, Blemish-prone skin 220-250
Innisfree Jeju Cherry Blossom Jelly Tone-Up Toner (Jelly-to-Foam) Jeju Cherry Blossom Extract, Vitamin C, Niacinamide Brightening, Dull skin 130-160

When comparing, consider that the Beauty of Joseon offering, while not a "bubble toner" in the strictest pressurized sense, is frequently mentioned in the same breath due to its transformative, rich texture that provides deep hydration and brightening through its potent ginseng and niacinamide blend. For a true foaming experience, the Some By Mi toner is a cult favorite for its effective yet gentle exfoliating trio of acids. The CNP toner is a luxurious hydrating treat, while the Dr. Jart+ option is a targeted treatment for oily skin.

Reader testimonials from Hong Kong forums often praise the Some By Mi toner for visibly reducing blackheads and the CNP toner for imparting an instant glow. The gentle nature of these foam formulas is a recurring highlight, especially for those in the city's humid and polluted environment.

Potential Side Effects and How to Avoid Them

While generally gentle, bubble toners are not immune to causing reactions. The primary risks involve allergies and sensitivities to specific ingredients. Even natural extracts or ferments can cause reactions in some individuals. Symptoms may include redness, itching, stinging, or breakouts.

The golden rule to prevent this is to always conduct a patch test before full application . Apply a small amount of the foam to a discreet area like behind your ear or the inner crook of your elbow. Wait 24-48 hours to see if any adverse reaction occurs. Only proceed to use it on your face if the test area remains clear.

If you have a known skin condition (like rosacea, severe eczema, or active dermatitis), are using prescription retinoids, or experience persistent irritation after a patch test, it is wise to consider consulting with a dermatologist or skincare professional . They can help you analyze the ingredient list and recommend products tailored to your skin's specific needs and tolerances.

Final Thoughts on Bubble Toners

Bubble toners represent a significant and delightful advancement in skincare technology. They successfully merge the lines between treatment and experience, offering deep hydration, gentle exfoliation, and brightening effects in one enjoyable step. By transforming the basic toner step into an active, skin-prepping ritual, they can enhance the efficacy of your entire routine. From the innovative formulations of K-beauty giants to the elegant, ingredient-focused philosophy of brands like Beauty of Joseon , there is a bubble toner out there for virtually every skin type and concern. By understanding your skin, reading labels carefully, and applying the product correctly, you can unlock the potential of this bubbly wonder for a healthier, more radiant complexion. Why not let a little foam transform your skincare routine today?